QuickStart
Congratulations, if you have reached this point, it means that you are about to discover the wonderful Fluent MVVM world.
Fluent MVVM it is a Open Source solution for WPF MVVM pathern. We are currently working to pass it to UWP and Xamarin.
QuickStart pretends to make a little tutorial about its instalation and its principals features such as: Autoinstance ViewModels, ViewModel ViewBag Property, Fluents RelayCommands, Fluent EventToCommands, Free IoC choice and Self Loaing ViewModel Property with using statement.
For providing a more in-depth analysis of Fluent MVVM characteristics we will have to click on its appropriate top menu link and we will navigate its section.
Installation
Fluent MVVM is designed to simplify the installation steps as much as possible. For its minimal installation it’s necessary:
- Install Fluent MVVM nuget package.
- Manually create Views and ViewModel project folders.
Installation Fluent MVVM Nuget Package
Important: The version number can change.
We will install the MVVM nuget Package:
Through PM:

Through Manage Nuget Packages:

Create MVVM Project Folders
Create MVVM folders is not necessary for Fluent MVVM worker, but it is a good practice for a correct MVVM pattern.

We will rename our MainWindow.xaml to MyView.xaml and we will copy to View folder.

We will modify name and location of window startup uri in app.xmal.
<Application x:Class="FluentMVVMExamples.App"
            xmlns="http://schemas.microsoft.com/winfx/2006/xaml/presentation"
            xmlns:x="http://schemas.microsoft.com/winfx/2006/xaml"
            xmlns:local="clr-namespace:FluentMVVMExamples"
            StartupUri="Views/MyView.xaml">
            <Application.Resources>


            </Application.Resources>
</Application>
AutoInstance ViewModel class
The moment has come to add a ViewModel class. Fluent MVVM has many forms to instance ViewModel classes. In this section we choose the faster and easer, because this is a QuickStart. In the AutoInstance ViewModel section, there are all ways to instance our ViewModels classes through IoC configurations for example, if we need dependency injection.
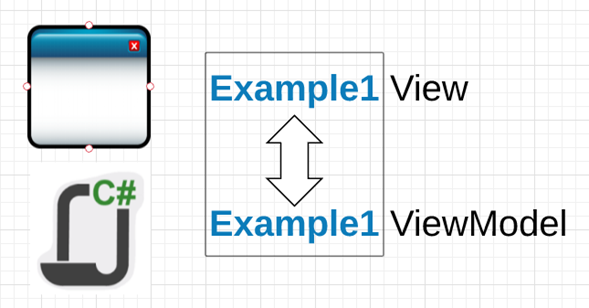
The View class name and the ViewModel class name have to be the same preceded by suffix View for the View class and ViewModel for the ViewModel class.
- SameNameClass[View].xaml / cs
- SameNameClass[ViewModel].cs
Our Example
- MyView.xaml / cs
- MyViewModel.cs
We will add our ViewModel class following the general autoInstace rule so that, its name will be MyViewModel.cs.
Setup the ViewModel Class
We will add a new ViewModel class in ViewModels Folder.

We will config ViewModel class, with a FluentMVVM using, inherit from ViewModelBase and create a constructor for to check the correct autoinstance with a breakpoint.
using MoralesLarios.FluentMVVM;

namespace FluentMVVMExamples.ViewModels
{
    public class MyViewModel : ViewModelBase
    {
            public MyViewModel()
           {

           }
    }
}
Go to the View, and we, add XAML using to MoralesLarios.FluentMVVM.Infrastructure and we will configure the XAML FluentMVVM simple AutoInstace AtachDependencyProperty AutoViewModelClass.IsUtomaticViewModelInstance to true.
<Window x:Class="FluentMVVMExamples.MyView"
            xmlns="http://schemas.microsoft.com/winfx/2006/xaml/presentation"
            xmlns:x="http://schemas.microsoft.com/winfx/2006/xaml"
            xmlns:d="http://schemas.microsoft.com/expression/blend/2008"
            xmlns:mc="http://schemas.openxmlformats.org/markup-compatibility/2006"
            xmlns:fluent="clr-namespace:MoralesLarios.FluentMVVM.Infrastructure;assembly=MoralesLarios.FluentMVVM"
            mc:Ignorable="d"
            fluent:AutoViewModelClass.IsAutomaticViewModelInstance="True"
            Title="SearchAll App Format" Height="803" Width="1089"
            AllowsTransparency="True"  WindowStyle="None" Background="Transparent" WindowStartupLocation="CenterScreen">
Run the project and Visual Studio stop the process in a ViewModel constructor breakpoint.
This video shows all process.
Add logic to ViewModel Class
The objective of this section is show with a simple example, the power of Fluent MVVM toolkit. In next sections we will see all characteristics in dept and we be completing the app.
To begin to process, we add 2 controls to our View, TextBox and Button. The easy initial goal is add event process controller than erase TextBox text in the click Button action.
This is the form image.

It could seem a complex form at first glance, but the window has only styles and grid ordination. Assume we have this form code:
<Window x:Class="FluentMVVMExamples.MyView"
            xmlns="http://schemas.microsoft.com/winfx/2006/xaml/presentation"
            xmlns:x="http://schemas.microsoft.com/winfx/2006/xaml"
            xmlns:d="http://schemas.microsoft.com/expression/blend/2008"
            xmlns:mc="http://schemas.openxmlformats.org/markup-compatibility/2006"
            xmlns:fluent="clr-namespace:MoralesLarios.FluentMVVM.Infrastructure;assembly=MoralesLarios.FluentMVVM"
            mc:Ignorable="d"
            fluent:AutoViewModelClass.IsAutomaticViewModelInstance="True"
            Title="SearchAll App Format" Height="803" Width="1089"
            AllowsTransparency="True"  WindowStyle="None" Background="Transparent" WindowStartupLocation="CenterScreen">
            <Grid Margin="2,2,10,10" Background="#FF242425">
            <TextBlock Text="Fluent MVVM" Style="{DynamicResource TitleT1Style}"/>
            <TextBlock Text="Fluent MVVM" Style="{DynamicResource TitleT1Style}"/>

            <Button Template="{StaticResource ClearallButtonStyle}" />
            <TextBlock Text="Insert text to clear from ViewModel" />
            <TextBox Style="{StaticResource SimpleTextBox}" />
            </Grid>
</Window>
Add code to MyViewModelClass.cs
using MoralesLarios.FluentMVVM;
using MoralesLarios.FluentMVVM.Infrastructure;

namespace FluentMVVMExamples.ViewModels
{
    public class MyViewModel : ViewModelBase
    {
        public MyViewModel()
        {
            ViewBag.TextPrincipal = string.Empty;  // Initialize TextPrincipal ViewBag Property
        }

            public SimpleRelayCommand ClearCommand => new SimpleRelayCommand
            (
                () => ViewBag.TextPrincipal = string.Empty,              // Execute
                () => ! string.IsNullOrEmpty(ViewBag.TextPrincipal)  // CanExecute
            );
    }
}
We have added next code:
Add MoralesLarios.FluentMVVM.Infrastructure
using MoralesLarios.FluentMVVM.Infrastructure;
Add TextPrincipal property initiation by ViewBag
public MyViewModel()
{
    ViewBag.TextPrincipal = string.Empty;  // Initialize TextPrincipal ViewBag Property
}
Diferences with ViewBag and without ViewBag:

Add CleanCommand
ViewBag.TextPrincipal = string.Empty;  // Initialize TextPrincipal ViewBag Property
}

                public SimpleRelayCommand ClearCommand => new SimpleRelayCommand
                (
                    () => ViewBag.TextPrincipal = string.Empty,              // Execute
                    () => ! string.IsNullOrEmpty(ViewBag.TextPrincipal)  // CanExecute
                );
}
Add code to MyView.xaml
We will add Texbox Text property binding and Command property button.
<Window x:Class="FluentMVVMExamples.MyView"
            xmlns="http://schemas.microsoft.com/winfx/2006/xaml/presentation"
            xmlns:x="http://schemas.microsoft.com/winfx/2006/xaml"
            xmlns:d="http://schemas.microsoft.com/expression/blend/2008"
            xmlns:mc="http://schemas.openxmlformats.org/markup-compatibility/2006"
            xmlns:fluent="clr-namespace:MoralesLarios.FluentMVVM.Infrastructure;assembly=MoralesLarios.FluentMVVM"
            mc:Ignorable="d"
            fluent:AutoViewModelClass.IsAutomaticViewModelInstance="True"
            Title="SearchAll App Format" Height="803" Width="1089"
            AllowsTransparency="True"  WindowStyle="None" Background="Transparent" WindowStartupLocation="CenterScreen">
            <Grid Margin="2,2,10,10" Background="#FF242425">
            <TextBlock Text="Fluent MVVM" Style="{DynamicResource TitleT1Style}"/>
            <TextBlock Text="Fluent MVVM" Style="{DynamicResource TitleT1Style}"/>

            <Button Command="{Binding ClearCommand}"
            Template="{StaticResource ClearallButtonStyle}" />
            <TextBlock Text="Insert text to clear from ViewModel" />
            <TextBox Text="{Binding ViewBag.TextPrincipal,
               Mode=TwoWay,
               UpdateSourceTrigger=PropertyChanged}"
            Style="{StaticResource SimpleTextBox}" />
            </Grid>
</Window>
Let's see it running.
Incorporating IoC
The moment has come to complicate our example. We are going to add a new functionality. We will add a new button and three DataGrids, when we will click in the new button, we will read TextBox Text property and we will separate this text in 3 sections: Vocals, Consonants and Special Characters, but each has its DataGrid.

In this section will discuss concepts of special RelayCommands , EventToCommands, Self Loading property and IoC configuration, but the important thing is to remember that we have all examples and all types in its sections.
We need a new worker that do the job of split and cataloging the info. This worker is MyCharManager and we will add this class to our project with its Interface (Its code it is irrelevant, but you see your implementation in download project). According to good practices, we must inject this new worker in the ViewModel constructor. For this work we will setup an IoC.
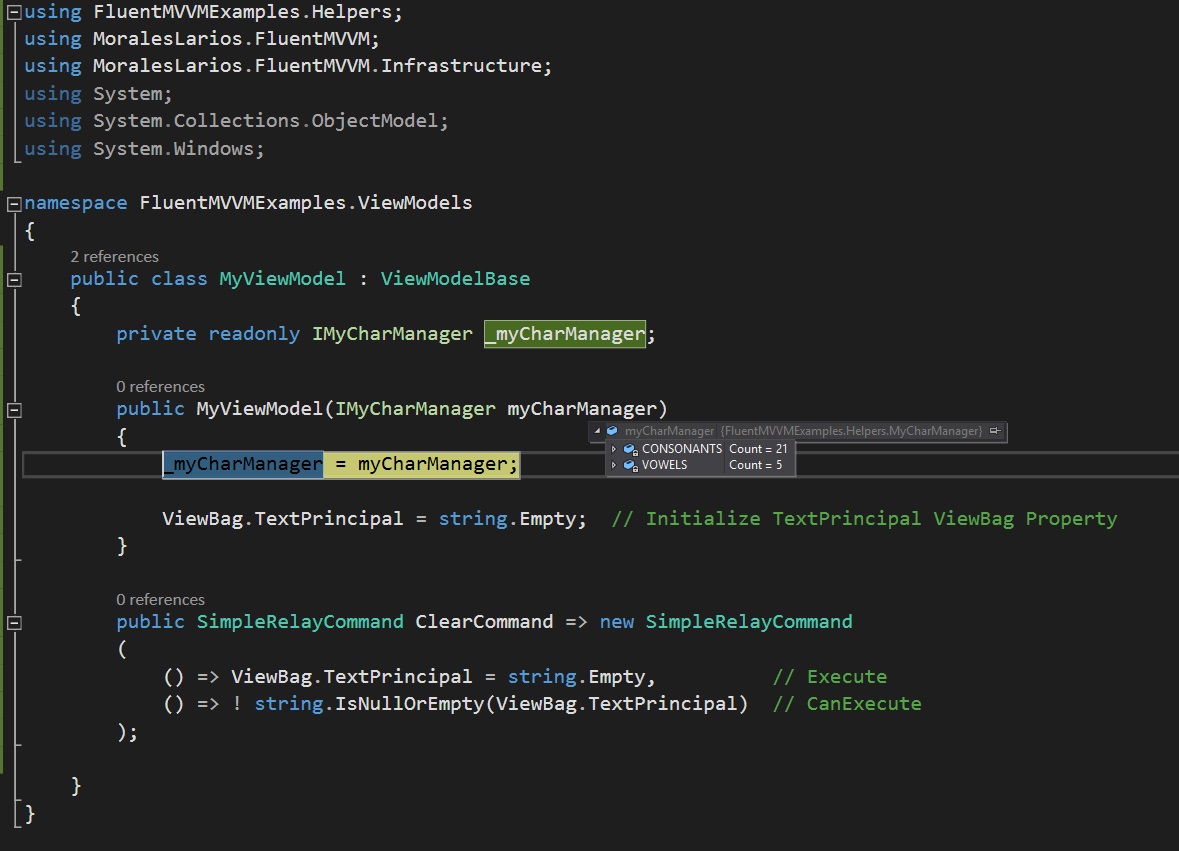
Add the Dependency Injection in MyViewModel class.
private readonly IMyCharManager _myCharManager;

public MyViewModel(IMyCharManager myCharManager)
{
    _myCharManager = myCharManager;

    ViewBag.TextPrincipal = string.Empty;  // Initialize TextPrincipal ViewBag Property
}
In this case, we have chosen Ninject IoC, but we can choose we like the most.
In this case, we have chosen Ninject IoC, but we can choose we like the most. In the Multi IoC configuration section you have all information and examples for others IoC configuration (AutoFac, SimpleIoC, etc).
We will install the Ninject IoC nuget.

We will create a new IoC project folder (this is optional) and IoC class. We will call it ContainerIoC.cs . This class must implement IContainerIoCWorker interface.

using FluentMVVMExamples.Helpers;
using FluentMVVMExamples.ViewModels;
using MoralesLarios.FluentMVVM.Infrastructure.IoC;
using Ninject;
using System;

namespace FluentMVVMExamples.IoC
{
    public class ContainerIoC : IContainerIoCWorker
    {
        public IKernel Container { get; private set; }

        public void RegisterTypes()
        {
            Container = new StandardKernel();
            Container.Bind<IMyCharManager>().To<MyCharManager>();
            Container.Bind<MyViewModel>().ToSelf();
        }

        public object ResolveObject(Type type)
        {
            if (type == null) return null;

            object result = Container.TryGet(type);

            return result;
        }

        public T ResolveType<T>()
        {
            T result = Container.TryGet<T>();

            return result;
        }
    }

}
We will modify the App.xaml.cs class. We will add a new IContainerIoCWorker necessary for AutoInstace ViewModels.

using FluentMVVMExamples.IoC;
using MoralesLarios.FluentMVVM.Infrastructure.IoC;
using System.Windows;

namespace FluentMVVMExamples
{
    public partial class App : Application
    {

        private IContainerIoCWorker _containerWorker;

        public IContainerIoCWorker ContainerWorker
        {
            get
            {
                if (_containerWorker == null)
                {
                    _containerWorker = new ContainerIoC();

                    _containerWorker.RegisterTypes();
                }

                return _containerWorker;
            }

            set => _containerWorker = value;
        }

    }
}
Once all these steps are done, the Fluent MVVM toolkit will understand that it has to load the ViewModel instance, from the IoC configuration, without touching anything in view.
Add more funcionality to ViewModel Class
Next we will add the infractructure
Next, we will add the infrastructure so our worker (IMyCharManager.cs) can work. We will insert needed controls to the view and we will completed our ViewModel class.
We insert, a button and 3 DataGrids in MyView.xaml.
<Button Command="{Binding ActionCommand}" Template="{StaticResource ActionButtonStyle}" Width="45" Height="45" Margin="552,124,78,386" />

<DataGrid ItemsSource="{Binding ViewBag.Vowels}" Margin="234,370,325,43" AutoGenerateColumns="True" />
<DataGrid ItemsSource="{Binding ViewBag.Consonants}" Margin="415,370,144,43" AutoGenerateColumns="True" />
<DataGrid ItemsSource="{Binding ViewBag.SpecialCharacters}" Margin=" 51,370,508,43" AutoGenerateColumns="True"/>
We add 3 ViewBag properties definition and we add a new SimpleRelayCommand with its ActionExecute private method.
using FluentMVVMExamples.Helpers;
using MoralesLarios.FluentMVVM;
using MoralesLarios.FluentMVVM.Infrastructure;
using System.Linq;

namespace FluentMVVMExamples.ViewModels
{
    public class MyViewModel : ViewModelBase
    {
        private readonly IMyCharManager _myCharManager;

        public MyViewModel(IMyCharManager myCharManager)
        {
            _myCharManager = myCharManager;

            ViewBag.TextPrincipal     = string.Empty;
            ViewBag.Vowels            = Enumerable.Empty<CharInfo>();
            ViewBag.Consonants        = Enumerable.Empty<CharInfo>();
            ViewBag.SpecialCharacters = Enumerable.Empty<CharInfo>();
        }

        public SimpleRelayCommand ClearCommand => new SimpleRelayCommand
        (
            () => ViewBag.TextPrincipal = string.Empty,          // Execute
            () => !string.IsNullOrEmpty(ViewBag.TextPrincipal)  // CanExecute
        );

        public SimpleRelayCommand ActionCommand => new SimpleRelayCommand
        (
            ActionExecute,
            () => !string.IsNullOrEmpty(ViewBag.TextPrincipal)  // CanExecute
        );

        private void ActionExecute()
        {
            ViewBag.Vowels            = _myCharManager.GetVowels           (ViewBag.TextPrincipal);
            ViewBag.Consonants        = _myCharManager.GetConsonants       (ViewBag.TextPrincipal);
            ViewBag.SpecialCharacters = _myCharManager.GetSpecialCharacters(ViewBag.TextPrincipal);
        }
    }
}
Let's see it running.
Messenger and Messages
Fluent MVVM toolkit tries make your live easy providing an object for this work its name is MessengerManager.
MessengerManager provide methods for manage send and subscribe messages. It combine simple methods and dynamic methods to make the development faster and smoother and avoid build specific classes for this goal. MessengerManager has generics methods versions for purists’ developers. You have available all types in your section Messengers.
We will add a new button to close the window. We will send a message from ViewModel to View for close screem.
Add code to MyViewModel.cs
Add MoralesLarios.FluentMVVM.Messages using.
using MoralesLarios.FluentMVVM.Messages;
Add a new SimpleRelayCommand to bind to close button.
public SimpleRelayCommand CloseCommand => new SimpleRelayCommand
(
    () => MessengerManager._.Send("CloseKey")
);
This call to Send method is a simple action because it is a non-generic method and it hasn’t send objects or callbacks delegates. It has only a string key to communicate with its suscriviers.
The ._. notation, is only a Singleton Representation. MessengerManager has only one reference in execution and it doesn’t depend of singleton IoC instantiation because it is necessary use in Windows xaml code behind code.
Add code to MyView.xaml
Add the close Button.

<Button Command="{Binding CloseCommand}" ... ToolTip="Close Screen" />
Add code to MyView.xaml.cs (Code Behind)
Add MoralesLarios.FluentMVVM.Messages using.
using MoralesLarios.FluentMVVM.Messages;
Add -CloseKey- Messenger suscrive in MyView.cs constructor.
public MyView()
{
    InitializeComponent();

    MessengerManager._.Subscribe("CloseKey", CloseAction);
}

private void CloseAction()
{
    Close();
}
All process in video.
Add MessageBox Confirmation
We should like to close QuickStart guide, we are going to add a MessageBox confirmation. Is very similar to simple close, but we will employ SuscribeWithCallback MessengerManager overload.
Modify MyViewModel.cs
public SimpleRelayCommand CloseCommand => new SimpleRelayCommand
(
    () => MessengerManager._.Send<string, bool>("CloseConfirmationKey", "Are you sure you want to close?", CloseConfirmationCallback)
);

private void CloseConfirmationCallback(bool response)
{
    if (response) MessengerManager._.Send("CloseKey");
}
In the new call, send a message with a string parameter and with callback bool with user response. If user response true, send a new message for close the window.
Modify MyView.xaml.cs
public MyView()
{
    InitializeComponent();

    MessengerManager._.SubscribeWithCallback<string, bool>("CloseConfirmationKey", CloseConfirmationExecute);
    MessengerManager._.Subscribe("CloseKey", () => Close());
}

private void CloseConfirmationExecute(string message, Action<bool> callback)
{
    var resultMessage = MessageBox.Show(message, "Close", MessageBoxButton.YesNo, MessageBoxImage.Information);

    var callBackParameter = resultMessage == MessageBoxResult.Yes;

    callback(callBackParameter);
}
All process in video.
Download QuickStart Code
No hay comentarios :
Publicar un comentario